Overlay Files
Overlay Files holds information on how Kometa should create Overlays. There are a large number of builders available to build Overlays,
Overview
This example is an Overlay File with a basic overlay which is saved in a file called MyOverlays.yml within the location mapped as config in my setup.
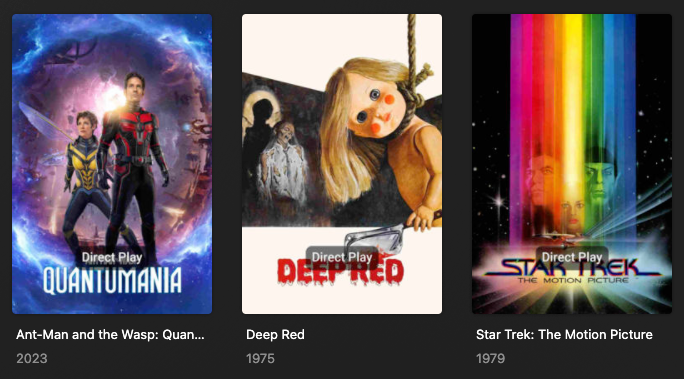
This specific example will target items in my library with a 4K resolution and will add an overlay with text that says "Direct Play" located at the bottom of the poster in the center.
Example Overlay
Click the icon to learn more
overlays: #(1)!
  directplay:
    overlay:
      name: text(Direct Play) #(2)!
      horizontal_offset: 0
      horizontal_align: center
      vertical_offset: 150
      vertical_align: bottom
      font_size: 63
      font_color: "#FFFFFF"
      back_color: "#00000099"
      back_radius: 30
      back_padding: 30
    plex_search: #(3)!
      all:
        resolution: 4K
- This must appear once and only once in any Overlay File
- This tells Kometa to use text as the overlay rather than an image
- This is the criteria that Kometa will use to define what should receive the overlay
Here is an example of how the Overlay will look
For the purpose of this example, we are going to save the File as MyOverlays.yml within the location mapped as config in our setup.
I then call "MyOverlays.yml" in my Configuration File within the Overlay_files section
config.yml Example Overlay File Addition
Click the icon to learn more
- This must match the name of a library in your Plex server
configrefers to the location that you mapped toconfigwhen following the Kometa Installation Guides.
Whenever I execute Kometa and the Movies library is run, MyOverlays.yml will run and my "Direct Play" overlay will appear on all items with a 4K resolution.
File Attributes
Overlay Files can utilize the following top-level attributes
| Attribute | Description |
|---|---|
overlays |
contains definitions of Overlays you wish to add to one or more libraries |
templates |
contains definitions of templates that can be leveraged by multiple Overlays |
external_templates |
contains file blocks that point to external templates that can be leveraged by multiple overlays |
- Example Files can be found in the Kometa Community Configs Repository
Overlay Understandings
Important Notes
When using overlays, there is some knowledge that you should be aware of at all times. This is outlined below.
Failure to understand all of these points may cause issues when utilizing Overlays.
All overlay coordinates assume 1000 x 1500 for Posters and 1920 x 1080 for Backgrounds and Title Cards.
All overlays should be in a format that is supports transparency should it be required (i.e. PNG)
If an overlay is not 1000 x 1500 or 1920 x 1080 in size, you will need to use positional attributes to specify where on the base poster the Overlay should be. This is exampled in Overview
Although Overlays are modular in that you can pick and choose what you would like to apply, each overlay you want to apply must be executed in the same Kometa run and should not be scheduled, this will result in overlays that are not scheduled to run being deleted.
- For example, you cannot schedule a "4K Resolution" overlay to only apply on a Monday and a "Direct Play" overlay to only apply on a Tuesday. This will not work, both overlays must be scheduled to run at the same time.
Kometa and Plex will not remove old Overlaid images from the Plex file structure or database when new updates are available. On large libraries, this can often result in Image Bloat.
- We recommend you read more about this and the solution on the ImageMaid page.
There is an attribute called reapply_overlays which, when set to true, will force overlays to reapply even when it is not necessary to do so [overlays only update when something has changed, this bypasses that behaviour]. This will increase how long Kometa takes to run and will also result in Image Bloat.
- Ensure
reapply_overlaysis set tofalseif you see it in your Configuration File. If it has previously been set to true we recommend using ImageMaid to get rid of the bloat.
To remove all overlays from your library, add the remove_overlays library attribute set to true.**
- See the above note on Kometa not removing the overlaid images, this is still true here.
Important Notice
Once you have applied overlays to your posters in Plex, it is highly recommended that you never change artwork on a thing directly in Plex again. Kometa uses labels on the items in Plex to decide if an overlay has been applied, so if you change artwork behind Kometa's back things can become confused and items can end up with double-overlaid posters. It's recommended to set new artwork using the asset directory, which will ensure that this doesn't happen.
To change a single overlay original image either remove the Overlay shared label and update the Image in Plex or replace the image in the assets folder and then Kometa will overlay the new image
Overlay Attributes
Overlay Files can utilize the following top-level attributes
| Attribute | Description |
|---|---|
overlays |
contains definitions of overlays you wish to add |
queues |
contains the positional attributes of queues |
templates |
contains definitions of templates that can be leveraged by multiple overlays |
external_templates |
contains file blocks that point to external templates that can be leveraged by multiple overlays |
overlaysis required in order to run the Overlay File.- Example Overlay Files can be found in the Kometa Community Configs Repository
There are multiple types of attributes that can be utilized within an overlay:
Example Files
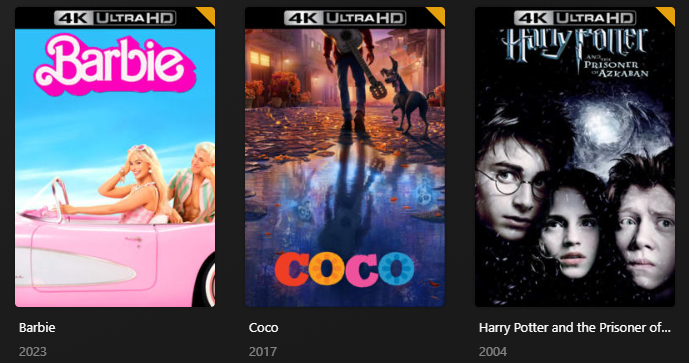
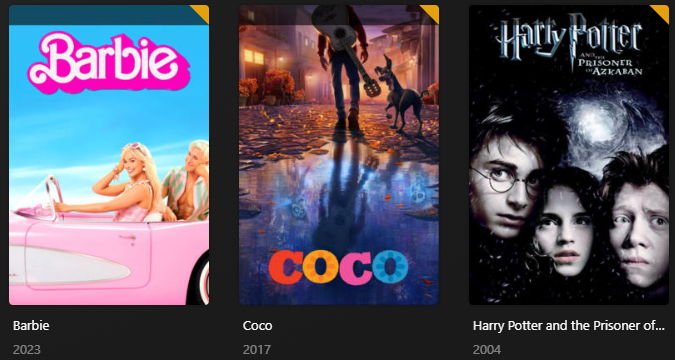
Below is a common Overlay File which will create an Overlay for all items which have a 4K resolution.
To get you started, Kometa includes three files for Overlays - 4K, Dolby and HDR.
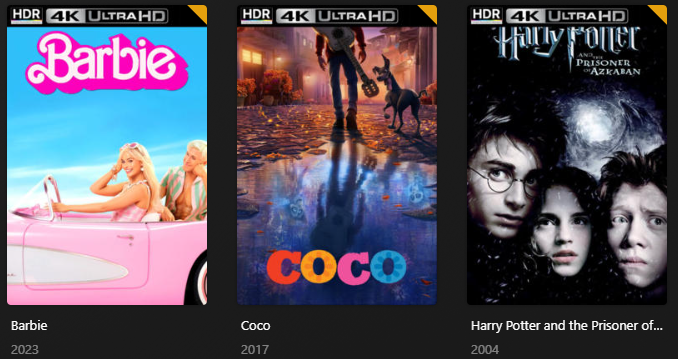
I can then layer another Overlay for items which have HDR.
Kometa will apply Overlays in the order they are defined in the file, so my HDR overlay appears on top of my 4K overlay in this scenario.
Advanced Overlay Attributes
The below attributes are also available for Overlay files, to give more granular control over how they function.
| Attribute | Description | Required |
|---|---|---|
group |
Name of the Grouping for this overlay. Only one overlay with the highest weight per group will be applied.weight is required when using groupValues: group name |
|
queue |
Name of the Queue for this overlay. Define queue positions using the queues attribute at the top level of an Overlay File. Overlay with the highest weight is applied to the first position and so on.weight is required when using queueValues: queue name |
|
addon_offset |
Text Addon Image Offset from the text.addon_offset Only works with text overlaysValue: Integer 0 or greater |
|
addon_position |
Text Addon Image Alignment in relation to the text.addon_position Only works with text overlaysValues: left, right, top, bottom |
|
back_align |
Alignment for the Text Overlay inside the backdrop. If back_align is not specified the Backdrop Centers the textback_width and back_height are required when using back_alignValues: left, right, center, top, bottom |
|
back_color |
Backdrop Color for the Text Overlay. Value: Color Hex Code in format #RGB, #RGBA, #RRGGBB or #RRGGBBAA. |
|
back_height |
Backdrop Height for the Text Overlay. If back_height is not specified the Backdrop Sizes to the textback_width is required when using back_heightValue: Integer greater than 0 |
|
back_line_color |
Backdrop Line Color for the Text Overlay. Value: Color Hex Code in format #RGB, #RGBA, #RRGGBB or #RRGGBBAA. |
|
back_line_width |
Backdrop Line Width for the Text Overlay. Value: Integer greater than 0 |
|
back_padding |
Backdrop Padding for the Text Overlay. Value: Integer greater than 0 |
|
back_radius |
Backdrop Radius for the Text Overlay. Value: Integer greater than 0 |
|
back_width |
Backdrop Width for the Text Overlay. If back_width is not specified the Backdrop Sizes to the textback_height is required when using back_widthValue: Integer greater than 0 |
|
file |
Local location of the Overlay Image. | |
font_color |
Font Color for the Text Overlay. Value: Color Hex Code in format #RGB, #RGBA, #RRGGBB or #RRGGBBAA. |
|
font_size |
Font Size for the Text Overlay. Value: Integer greater than 0 |
|
font_style |
Font style for Variable Fonts. Only needed when using a Variable Font. The valid values depend on the font; the default font (fonts/Inter-Medium.ttf) exposes Thin, ExtraLight, Light, Regular, Medium, SemiBold, Bold, ExtraBold, Black. For other fonts, the runtime error message lists the valid options.Value: Variable Font Style |
|
font |
System Font Filename or path to font file for the Text Overlay. Value: System Font Filename or path to font file |
|
git |
Location in the Configs Repo of the Overlay Image. | |
horizontal_align |
Horizontal Alignment of the overlay. Values: left, center, right |
|
horizontal_offset |
Horizontal Offset of this overlay. Can be a %.vertical_offset is required when using horizontal_offsetValue: Integer 0 or greater or 0%-100% |
|
name |
Name of the overlay. | |
repo |
Location in the Custom Repo of the Overlay Image. | |
scale_height |
Height to scale the Image to in the overlay. When scale_width is not used with this attribute it will be automatically scaled at the same ratio. (Applies to the addon Image for text overlays)Value: Integer greater than 0 or Percent greater than 0% |
|
scale_width |
Width to scale the Image to in the overlay. When scale_height is not used with this attribute it will be automatically scaled at the same ratio. (Applies to the addon Image for text overlays)Value: Integer greater than 0 or Percent greater than 0% |
|
stroke_color |
Font Stroke Color for the Text Overlay. Value: Color Hex Code in format #RGB, #RGBA, #RRGGBB or #RRGGBBAA. |
|
stroke_width |
Font Stroke Width for the Text Overlay. Value: Integer greater than 0 |
|
url |
URL of Overlay Image Online. | |
vertical_align |
Vertical Alignment of the overlay. Values: top, center, bottom |
|
vertical_offset |
Vertical Offset of this overlay. Can be a %.horizontal_offset is required when using vertical_offsetValue: Integer 0 or greater or 0%-100% |
|
weight |
Weight of this overlay in its group or queue.group or queue is required when using weightValues: Integer 0 or greater |
- If
url,git, andrepoare all not defined then Kometa will look in yourconfig/overlaysfolder for a.pngfile named the same as thenameattribute.
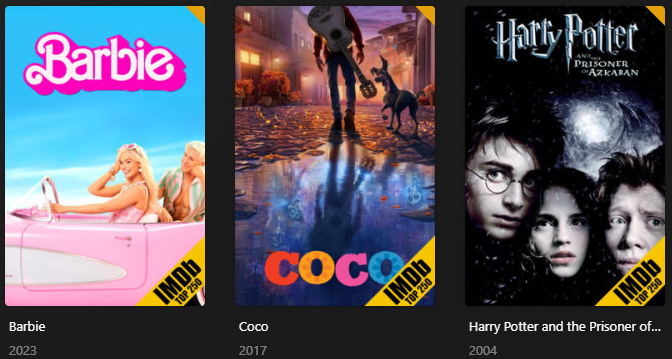
Positional Image Overlays
Positional overlays can be of any size and use horizontal_offset, horizontal_align, vertical_offset, and vertical_align to position the overlay on the image.
Tip
This overlay example uses one of the Kometa Default Overlay images, which isn't necessary but is used just for this example.
overlays:
IMDB-Top-250:
imdb_chart: top_movies
overlay:
name: IMDB-Top-250
default: ribbon/yellow/imdb.png
horizontal_offset: 0
horizontal_align: right
vertical_offset: 0
vertical_align: bottom
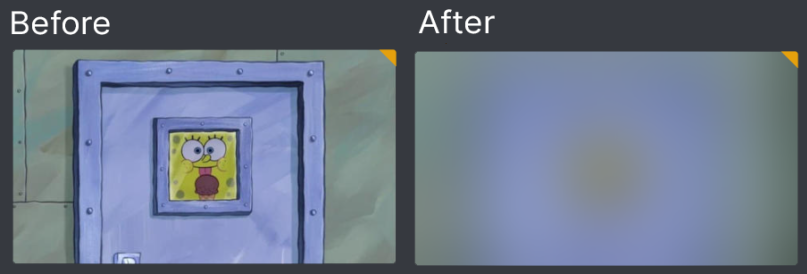
Blurring Overlay
There is a special overlay named blur that when given as the overlay name will instead of finding the image will just blur the image instead.
You can control the level of the blur by providing a number with the attribute like so blur(##).
Backdrop Overlay
There is a special overlay named backdrop that when given as the overlay name will instead of finding the image will just apply the background instead.
You can set the size of the backdrop with back_width and back_height. By Default, they will extend the length of the Image.
overlays:
backdrop:
overlay:
name: backdrop
back_color: "#00000099"
back_height: 100
vertical_align: top
plex_all: true
This example could be useful if you want to have a black banner, and then use a Text Overlay to add text on top.
Text Overlay
You can add text as an overlay using the special text() overlay name. Anything inside the parentheses will be added as an overlay onto the image. Ex text(4K) adds 4K to the image.
You can control the font, font size and font color using the font, font_size, and font_color overlay attributes.
You can control the backdrop of the text using the various back_* attributes.
The horizontal_offset and vertical_offset overlay attributes are required when using Text Overlays.
Kometa includes multiple fonts in the fonts folder which can be called using fonts/fontname.ttf
overlays:
backdrop:
overlay:
name: backdrop
back_color: "#00000099"
back_height: 100
vertical_align: top
plex_all: true
mytext:
overlay:
name: text(This Movie Is Awesome)
horizontal_offset: 0
horizontal_align: center
vertical_offset: 30
vertical_align: top
font_size: 63
font_color: "#FFFFFF"
plex_all: true
Note that we have built up on our backdrop overlay that we created in our previous example

Special Text Variables
You can use the item's metadata to determine the text by adding Special Text Variables to your text Overlay.
Each Special Text Variables has multiple modifiers that can be used to format the text. The variables are defined like this <<name$>> where name is the Special Text Variable and the modifier is $.
Special Rating Text
| Variable | Description | Item Types |
|---|---|---|
anidb_average_rating |
AniDB Average Rating | Movies or Shows |
anidb_rating |
AniDB Rating | Movies or Shows |
anidb_score_rating |
AniDB Score Rating | Movies or Shows |
audience_rating |
Plex Audience Rating | Movies, Shows, or Episodes |
critic_rating |
Plex Critic Rating | Movies, Shows, or Episodes |
imdb_rating |
IMDb Rating | Movies, Shows, Seasons , or Episodes |
mal_rating |
MyAnimeList Rating | Movies or Shows |
mdb_average_rating |
MDBList Average Rating | Movies, Shows, Seasons or Episodes |
mdb_imdb_rating |
MDBList IMDb Rating | Movies, Shows, Seasons or Episodes |
mdb_letterboxd_rating |
MDBList Letterboxd Rating | Movies, Shows, Seasons or Episodes |
mdb_metacritic_rating |
MDBList Metacritic Rating | Movies, Shows, Seasons or Episodes |
mdb_metacriticuser_rating |
MDBList Metacritic User Rating | Movies, Shows, Seasons or Episodes |
mdb_myanimelist_rating |
MDBList MyAnimeList Rating | Movies, Shows, Seasons or Episodes |
mdb_rating |
MDBList Rating | Movies, Shows, Seasons or Episodes |
mdb_tmdb_rating |
MDBList TMDb Rating | Movies, Shows, Seasons or Episodes |
mdb_tomatoes_rating |
MDBList Rotten Tomatoes Rating | Movies, Shows, Seasons or Episodes |
mdb_tomatoesaudience_rating |
MDBList Rotten Tomatoes Audience Rating | Movies, Shows, Seasons or Episodes |
mdb_trakt_rating |
MDBList Trakt Rating | Movies, Shows, Seasons or Episodes |
omdb_imdb_rating |
OMDb IMDb Rating | Movies, Shows, Seasons or Episodes |
omdb_metascore_rating |
OMDb Metascore Rating | Movies, Shows, Seasons or Episodes |
omdb_tomatoes_rating |
OMDb Rotten Tomatoes Rating | Movies, Shows, Seasons or Episodes |
plex_imdb_rating |
Plex IMDb Rating | Movies, Shows, Seasons or Episodes |
plex_tmdb_rating |
Plex TMDb Rating | Movies, Shows, Seasons or Episodes |
plex_tomatoes_rating |
Plex Rotten Tomatoes Rating | Movies, Shows, Seasons |
plex_tomatoesaudience_rating |
Plex Rotten Tomatoes Audience Rating | Movies, Shows, Seasons |
tmdb_rating |
TMDb Rating | Movies, Shows, Seasons, or Episodes |
trakt_rating |
Trakt Rating | Movies, Shows, Seasons or Episodes |
trakt_user_rating |
Trakt User Rating | Movies, Shows, Seasons or Episodes |
user_rating |
Plex User Rating | Movies, Shows, Seasons, or Episodes |
Special Rating Text Modifiers
| Modifier | Description | Example |
|---|---|---|
None |
Rating on a 10 point scale | 8.7, 9.0 |
% |
Rating out of 100 | 87, 90 |
# |
Rating on a 10 point scale removing .0 as needed |
8.7, 9 |
/ |
Rating on a 5 point scale | 8.6 shows as 4.3, 9.0 shows as 4.5 |
Note on mdb sources
MDBList is not a live reflection of third-party sites such as CommonSense and Trakt. The data on MDBList is often days, weeks and months out of date as it is only periodically refreshed. As such, the data that Kometa applies using mdb_ operations applies may not be the same as you see if you visit those third-party sources directly.
Special String Text
| Variable | Description | Item Types |
|---|---|---|
content_rating |
Item's Content Rating | Movies, Shows, or Episodes |
edition |
Item's Edition | Movies or Shows |
original_title |
Item's Original Title | Movies or Shows |
season_title |
Item's Parent Season Title | Episodes |
show_title |
Item's Parent Show Title | Seasons or Episodes |
title |
Item's Title | Movies, Shows, Seasons, or Episodes |
Special String Text Modifiers
| Modifier | Description |
|---|---|
None |
Exact Text |
U |
Text with the first letter Capitalized |
L |
Text with the first letter Lowercase |
P |
Text with most words Capitalized |
Special Number Text
| Variable | Description | Item Types |
|---|---|---|
episode_count |
Number of Episodes | Shows or Seasons |
episode_number |
Episode Number | Episodes |
season_number |
Season Number | Seasons or Episodes |
versions |
Number of Versions of the Item | Movies or Episodes |
Special Number Text Modifiers
| Modifier | Description | Example |
|---|---|---|
None |
Exact Number | 1 |
W |
Number as Words | One |
WU |
Number as Uppercase Words | ONE |
WL |
Number as Lowercase Words | one |
0 |
Number with 10s Padding | 01 |
00 |
Number with 100s Padding | 001 |
Other Special Text
| Special Text Variables & Mods | Item Types |
|---|---|
<<bitrate>>: Bitrate of the first media file for an item.<<bitrateH>>: Bitrate of the media file with the highest bitrate<<bitrateL>>: Bitrate of the media file with the lowest bitrate |
Movies or Episodes |
<<originally_available>>: Original Available Date of the Item<<originally_available[FORMAT]>>: Original Available Date of the Item in the given format. Format Options |
Movies, Shows, or Episodes |
<<runtime>>: Complete Runtime of the Item in minutes (150)<<runtimeH>>: Hours in runtime of the Item (2)<<runtimeM>>: Minutes remaining in the hour in the runtime of the Item (30)Show and Season use average Episode Runtime. |
Movies, Shows, Seasons, or Episodes |
<<total_runtime>>: Complete combined Runtime of all Episodes/Tracks of the Item in minutes (150)<<total_runtimeH>>: Hours in total runtime of the Item (2)<<total_runtimeM>>: Minutes remaining in the hour in the runtime of the Item (30) |
Shows, Seasons, Artists, or Albums |
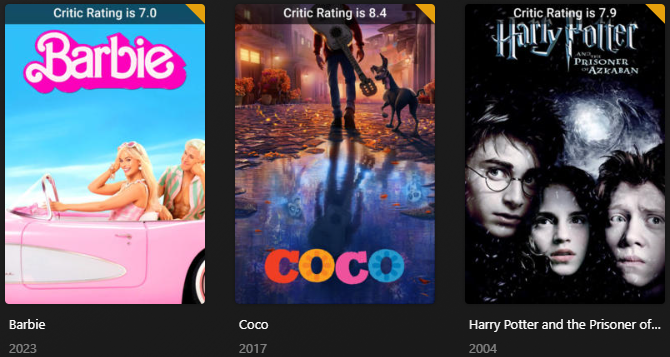
overlays:
backdrop:
overlay:
name: backdrop
back_color: "#00000099"
back_height: 100
vertical_align: top
plex_all: true
mytext:
overlay:
name: text(Critic Rating is <<critic_rating>>)
horizontal_offset: 0
horizontal_align: center
vertical_offset: 20
vertical_align: top
font_size: 63
font_color: "#FFFFFF"
plex_all: true
Note that we have once again built up on our backdrop overlay that we created in one of our previous examples
Special Text Modifiers
Some Special Text attributes (such as ratings) have modifiers which control how they are output. This is detailed in the above table.
Using the above example for the Critic Rating overlay, I now want to display the rating as "out of 5 stars" instead of "out of 10", so I will use the / modifier on my <<critic_rating>> attribute
overlays:
backdrop:
overlay:
name: backdrop
back_color: "#00000099"
back_height: 100
vertical_align: top
plex_all: true
mytext:
overlay:
name: text(Rated <<critic_rating/>> out of 5!)
horizontal_offset: 0
horizontal_align: center
vertical_offset: 20
vertical_align: top
font_size: 63
font_color: "#FFFFFF"
plex_all: true

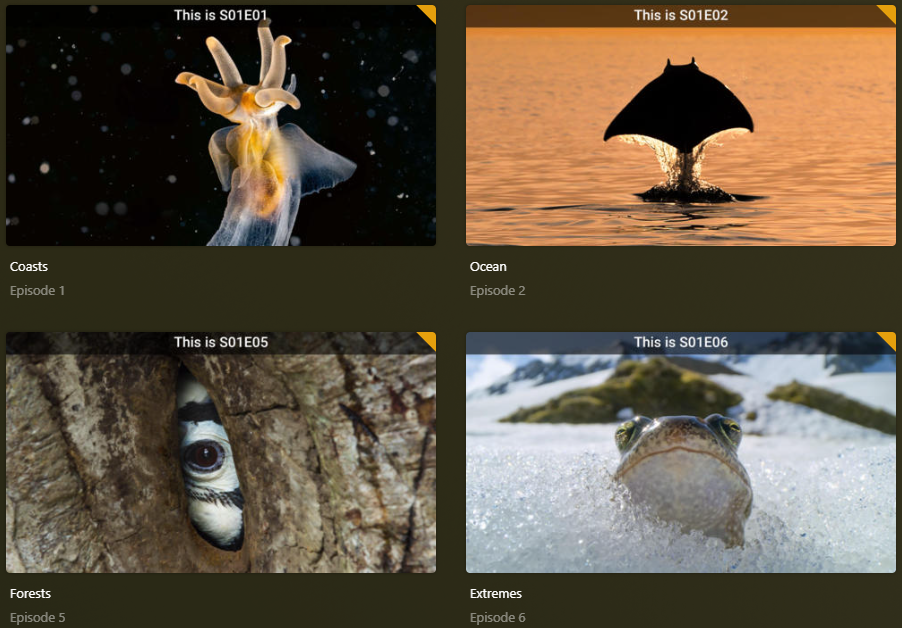
I want to add S##E## to all my episode images.
overlays:
backdrop:
builder_level: episode
overlay:
name: backdrop
back_color: "#00000099"
back_height: 100
vertical_align: top
plex_all: true
season_episode_info:
builder_level: episode
overlay:
name: text(This is S<<season_number0>>E<<episode_number0>>)
horizontal_offset: 0
horizontal_align: center
vertical_offset: 20
vertical_align: top
font_size: 63
font_color: "#FFFFFF"
plex_all: true
Common Special Text Uses
These are some commonly-used examples of Special Text overlays:
| Special Text | Example Output |
|---|---|
name: "text(Runtime: <<runtime>>m)" |
Runtime: 90m |
name: "text(Runtime: <<runtimeH>>h <<runtimeM>>m)" |
Runtime: 1h 30m |
name: text(Episode <<episode_number>>) |
Episode 1 |
name: text(S<<season_number0>>E<<episode_number0>>) |
S01E01 |
name: text(Season <<season_number>> Episode <<episode_number>>) |
Season 1 Episode 1 |
name: text(Season <<season_number>>) |
Season 1 |
Text Addon Images
You can add an image to accompany the text by specifying the image location using file, url, git, or repo.
Use addon_offset to control the space between the text and the image.
Use addon_position to control which side of the text the image will be located on.
Tip
This overlay example uses one of the Kometa Default Overlay images, which isn't necessary but is used just for this example.
overlays:
rating_with_logo:
overlay:
name: text(audience_rating)
default: rating/IMDb.png
horizontal_offset: 15
horizontal_align: left
vertical_offset: 15
vertical_align: top
font: fonts/Inter-Medium.ttf
font_size: 63
font_color: "#FFFFFF"
back_color: "#00000099"
back_radius: 30
back_width: 300
back_height: 105
addon_position: left
addon_offset: 25
plex_all: true
Overlay Groups
Overlay groups are defined by the name given to the group attribute. Only one overlay with the highest weight per group will be applied.
This is an example where the Multi-Audio overlay will be applied over the Dual-Audio overlay for every item found by both.
overlays:
Dual-Audio:
overlay:
name: Dual-Audio
default: images/Dual-Audio
group: audio_language
weight: 10
horizontal_offset: 0
horizontal_align: center
vertical_offset: 15
vertical_align: bottom
plex_all: true
filters:
audio_language.count_gt: 1
Multi-Audio:
overlay:
name: Multi-Audio
default: images/Multi-Audio
group: audio_language
weight: 20
horizontal_offset: 0
horizontal_align: center
vertical_offset: 15
vertical_align: bottom
plex_all: true
filters:
audio_language.count_gt: 2
Overlay Queues
Overlay queues are defined by the name given to the queue attribute. The overlay with the highest weight is put into the first queue position, then the second highest is placed in the second queue position and so on.
You can define the queue positions by using the queues attribute at the top level of an Overlay File. You can define as many positions as you want.
queues:
custom_queue_name:
- horizontal_offset: 300 # This is the first position
horizontal_align: center
vertical_offset: 1375
vertical_align: top
- horizontal_offset: 300 # This is the second position
horizontal_align: center
vertical_offset: 1250
vertical_align: top
overlays:
IMDb:
imdb_chart: popular_movies
overlay:
name: text(IMDb Popular)
queue: custom_queue_name
weight: 20
font: fonts/Inter-Medium.ttf
font_size: 65
font_color: "#FFFFFF"
back_color: "#00000099"
back_radius: 30
back_width: 380
back_height: 105
TMDb:
tmdb_popular: 100
overlay:
name: text(TMDb Popular)
queue: custom_queue_name
weight: 10
font: fonts/Inter-Medium.ttf
font_size: 65
font_color: "#FFFFFF"
back_color: "#00000099"
back_radius: 30
back_width: 400
back_height: 105
To save space when using queues if one attribute is not defined then it will inherit that attribute from the queue before it.
queues:
custom_queue_name:
- horizontal_offset: 300 # This is the first position
horizontal_align: center
vertical_offset: 1375
vertical_align: top
- vertical_offset: 1250 # This is the second position
- vertical_offset: 1125 # This is the third position
Dynamic Queues
Dynamic Queues build queues based on a set of values. To make a dynamic queue instead of having a list under the queue name you use the settings attribute.
settings Attributes |
Description |
|---|---|
conditionals |
Set conditional variables. |
default |
Set default variables. |
dynamic_position |
Dynamic Position Attributes |
overlay_limit |
Max number of overlays to use. Value: Any Integer greater than 0 |
dynamic_position Attributes |
Description |
|---|---|
horizontal_spacing |
Controls the horizontal spacing between different overlays in the queue. Values: Number 0 or greater |
initial_horizontal_align |
Controls the initial Horizontal Alignment of the overlay queue. Values: left, center, or right |
initial_horizontal_offset |
Controls the initial Horizontal Offset of this overlay queue. Can be a %. Values: Number 0 or greater or 0%-100% [pixels assuming a 1000x1500 image] |
initial_vertical_align |
Controls the initial Vertical Alignment of the overlay queue. Values: top, center, or bottom |
initial_vertical_offset |
Controls the initial Vertical Offset of this overlay queue. Can be a %. Values: Number 0 or greater or 0%-100% [pixels assuming a 1000x1500 image] |
surround |
Sets the queue so the second queue option is on one side of the original and then the next is on the opposite side. Values: true to make the queue a surrounded queue. |
vertical_spacing |
Controls the vertical spacing between different overlays in the queue. Values: Number 0 or greater |
queues:
flags:
settings:
dynamic_position:
initial_vertical_align: top
initial_horizontal_align: left
initial_vertical_offset: 15
initial_horizontal_offset: 15
vertical_spacing: 60
horizontal_spacing: 0
surround: false
overlay_limit: 3
- This will place 3 overlays with a different vertical offset of 15, 75, 135.
Value Filter
value_filter is an overlay-file-only attribute that filters items at selection time based on a runtime-fetched numeric value. It is a post-filter (AND on top of whatever the builder returned) — only items where all conditions pass are included.
It is the counterpart to plex_search for values that don't live in Plex's database. plex_search handles Plex-native attributes via an efficient DB query; value_filter handles values fetched at runtime from external sources such as IMDb, TMDb, MDBList, and Rotten Tomatoes.
overlays:
RT Fresh:
overlay:
name: text(mdb_tomatoes_rating)
default: rating/RT-TomatoFresh.png
plex_all: true
value_filter:
mdb_tomatoes_rating.gte: 6.0
RT Rotten:
overlay:
name: text(mdb_tomatoes_rating)
default: rating/RT-TomatoRotten.png
plex_all: true
value_filter:
mdb_tomatoes_rating.lt: 6.0
Multiple conditions are supported and combined with AND logic — all must pass for an item to be included:
Comparators
| Comparator | Meaning |
|---|---|
.gte |
Greater than or equal to |
.gt |
Greater than |
.lt |
Less than |
.lte |
Less than or equal to |
Supported Variables
All values use Kometa's normalised 0–10 scale regardless of source (e.g. a Rotten Tomatoes score of 79% is 7.9). The default Fresh threshold used by the ratings defaults file is 6.0 (equivalent to 60%).
Supported variables: anidb_average_rating, anidb_rating, anidb_score_rating, imdb_rating, mal_rating, mdb_average_rating, mdb_imdb_rating, mdb_letterboxd_rating, mdb_metacritic_rating, mdb_metacriticuser_rating, mdb_myanimelist_rating, mdb_rating, mdb_tmdb_rating, mdb_tomatoes_rating, mdb_tomatoesaudience_rating, mdb_trakt_rating, omdb_rating, omdb_imdb_rating, omdb_metascore_rating, omdb_tomatoes_rating, plex_imdb_rating, plex_tmdb_rating, plex_tomatoes_rating, plex_tomatoesaudience_rating, tmdb_rating, trakt_rating, trakt_user_rating.
Caching
Values are written to overlay_value_cache on first fetch and refreshed after your configured cache_expiration days. The filter and the render phase share the same cache entry — no value is fetched twice per item per run.
Behaviour on missing values
If a value cannot be fetched (the item has no rating, or the external API is unavailable), the item is excluded from the overlay for that run and a trace-level log entry is written. The item is retried on every subsequent run rather than being permanently skipped.
Relationship to filters
filters and value_filter are independent and both apply as AND conditions. filters operates on Plex metadata already in the item set; value_filter fetches external values. You can combine them freely:
Suppress Overlays
You can add suppress_overlays to an overlay definition and give it a list or comma separated string of overlay names you want suppressed from this item if this overlay is attached to the item.
So in this example if the 4K-HDR overlay matches an item then the 4K and HDR overlays will also match. The suppress_overlays attribute on 4K-HDR will stop the overlays specified (4K and HDR) from also being applied.
overlays:
  4K:
    plex_search:
      all:
        resolution: 4K
HDR:
plex_search:
all:
hdr: true
4K-HDR:
suppress_overlays:
- 4K
- HDR
plex_search:
all:
resolution: 4K
hdr: true
Examples
Example Overlay File
overlays:
  4K:
    overlay:
      name: 4K    # This will look for a local overlays/4K.png in your config folder
    plex_search:
      all:
        resolution: 4K
  HDR:
    overlay:
      name: HDR
      default: HDR
    plex_search:
      all:
        hdr: true
  Dolby:
    overlay:
      name: Dolby
      url: https://somewebsite.com/dolby_overlay.png
    plex_all: true
    filters:
      has_dolby_vision: true